Improved Perceived Performance with Skeleton Screens

Skeleton screens… You might think they sound a little scary and or that they’re hard to implement, but what if I told you that they are actually quite simple to make. Once added to your app, skeleton screens become an awesome feature to make your app feel incredibly fast.
When building an app, you’re always making sure that you are doing everything correctly from a technical perspective to ensure great performance. But another, often ignored part of performance is called perceived performance. Perceived performance is how fast an action appears to happen to the user. Skeleton screens are a great way to improve the perceived performance of your app, when combined with traditional optimizations (lazy loading, code splitting, etc).
Let’s dive a little deeper into what skeleton screens are, why they are better than traditional loading spinners, and how Ionic makes it easy to use them!
Skeleton screens, not a scary movie
You have probably seen skeleton screens before if you have used Facebook, Slack or Medium, but let’s go into detail about what they are. We can think of skeleton screens as rendering the “skeleton” or a “mockup” of content before it has actually loaded. For example, here’s what Medium does:
As you can see, Medium is rendering some grey bars where content will be once it has loaded and also renders a grey box where the image will be once it has loaded.
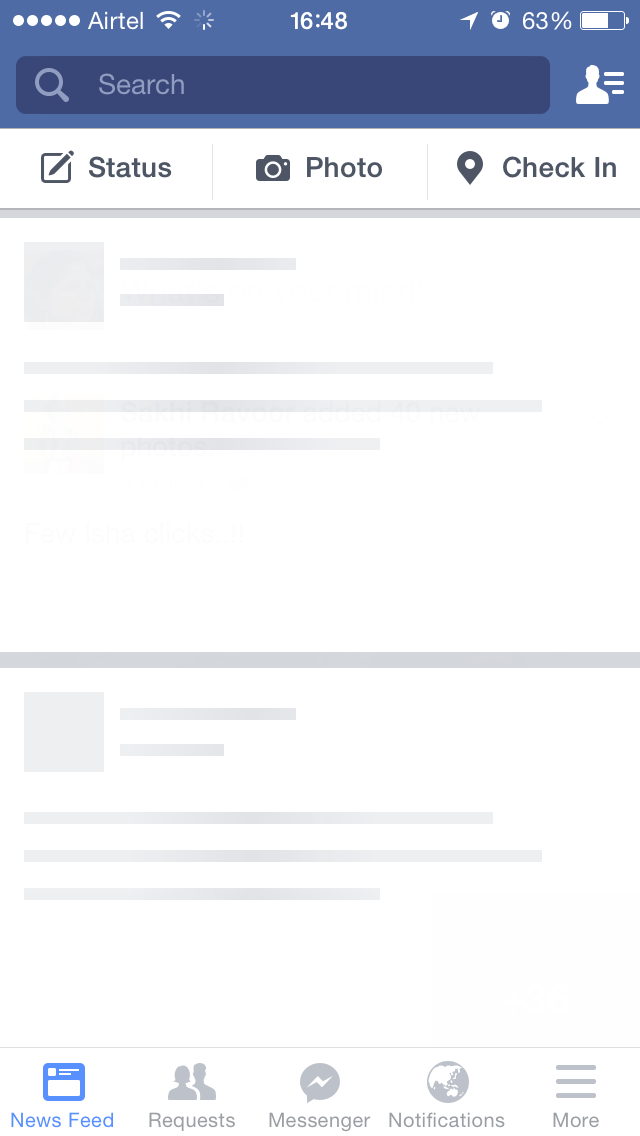
Another good example is Facebook. They make heavy use of skeleton screens in their native app and web app. They use a similar implementation to Medium, rendering a Skeleton Screen where content will eventually be:
That’s coo…but why?
As we mentioned above, skeleton screens can be better at increasing perceived performance than loading spinners, but why?
Let’s consider an app that only uses loading indicators and look at how it could benefit from using skeleton screens.
Loading Indicator
Skeleton screen
The page using a skeleton screen has several advantages here that lead to a better experience including:
- It feels faster by giving an indication of what the content is going to look like before it has loaded.
- We never block the user from interacting with the app. The user is free to scroll and interact with the app even while the content is still being loaded.
- The page using a loading indicator is a very jarring experience as it flashes from a loading spinner to the fully loaded page. Whereas the page using skeleton screens provides a much smoother experience when the content loads.
Sweet, can I haz now?
Skeleton screens are pretty simple to make with plain HTML and a little CSS. Here is an example of a simple Skeleton Screen in Ionic-Angular.
In the above StackBlitz example, we hide the real list of users and display the skeleton list until the users have loaded using *ngIf. In our skeleton item we have the same DOM as our real item, an h2, h3 and p element.
<!--
   Our users list which will be rendered once
   our users have loaded
 -->
  <ion-list *ngIf="users">
    <ion-item *ngFor="let user of users">
      <h2>{{user.name}}</h2>
      <h3>Email: {{user.email}}</h3>
      <p>Company: {{user.company.name}}</p>
    </ion-item>
  </ion-list>

  <ion-list *ngIf="!users">
    <ion-item *ngFor="let fake of fakeUsers" class="fakeItem">
      <h2></h2>
      <h3></h3>
      <p></p>
    </ion-item>
  </ion-list>
In our Sass we give each element a height, background color, opacity and a bit of margin. We then give each element a width based on the normal width of the element once the real users are loaded.
.fakeItem {
 h2, h3, p {
   background-color: lightgrey;
   opacity: 0.5;
   height: 1em;
   margin-top: 10px;
 }

 h2 {
   width: 35%;
 }

 h3 {
   width: 40%;
 }

 p {
   width: 60%;
 }
}
This renders a skeleton screen that is extremely similar in layout to the actual content of the page.
Upcoming ion-skeleton-text component
We are always searching for ways to make things easy and in 4.0 of Ionic, we have a new web component called ion-skeleton-text. This will make adding skeleton screens even easier!
<ion-item>
  <ion-skeleton-text width="40px"></ion-skeleton-text>
</ion-item>
The width property here being used in the same way as our CSS width property in the previous example.
Parting words
Skeleton screens can be a very powerful way to increase the perceived performance of your and make your app feel incredibly fast. When combined with traditional performance optimizations, skeleton screens can take your app to the next level of performance. As you can see skeleton screens are very easy to do in ionic-angular today, and with the next version of Ionic it will only get easier. Implement skeleton screens into your app today!