Adding Social Login with Firebase

Firebase has become one of the most popular backend solutions for modern apps. With SDKs for almost every platform you can think of, it provides a real-time database that allows you to keep all your users in sync.
Firebase also has awesome authentication APIs that make adding social logins incredibly simple. If you don’t have a Firebase account, you can sign up free here. Let’s look at how we can add GitHub authentication to an existing app with Firebase and Ionic.
Setting up authentication in Firebase
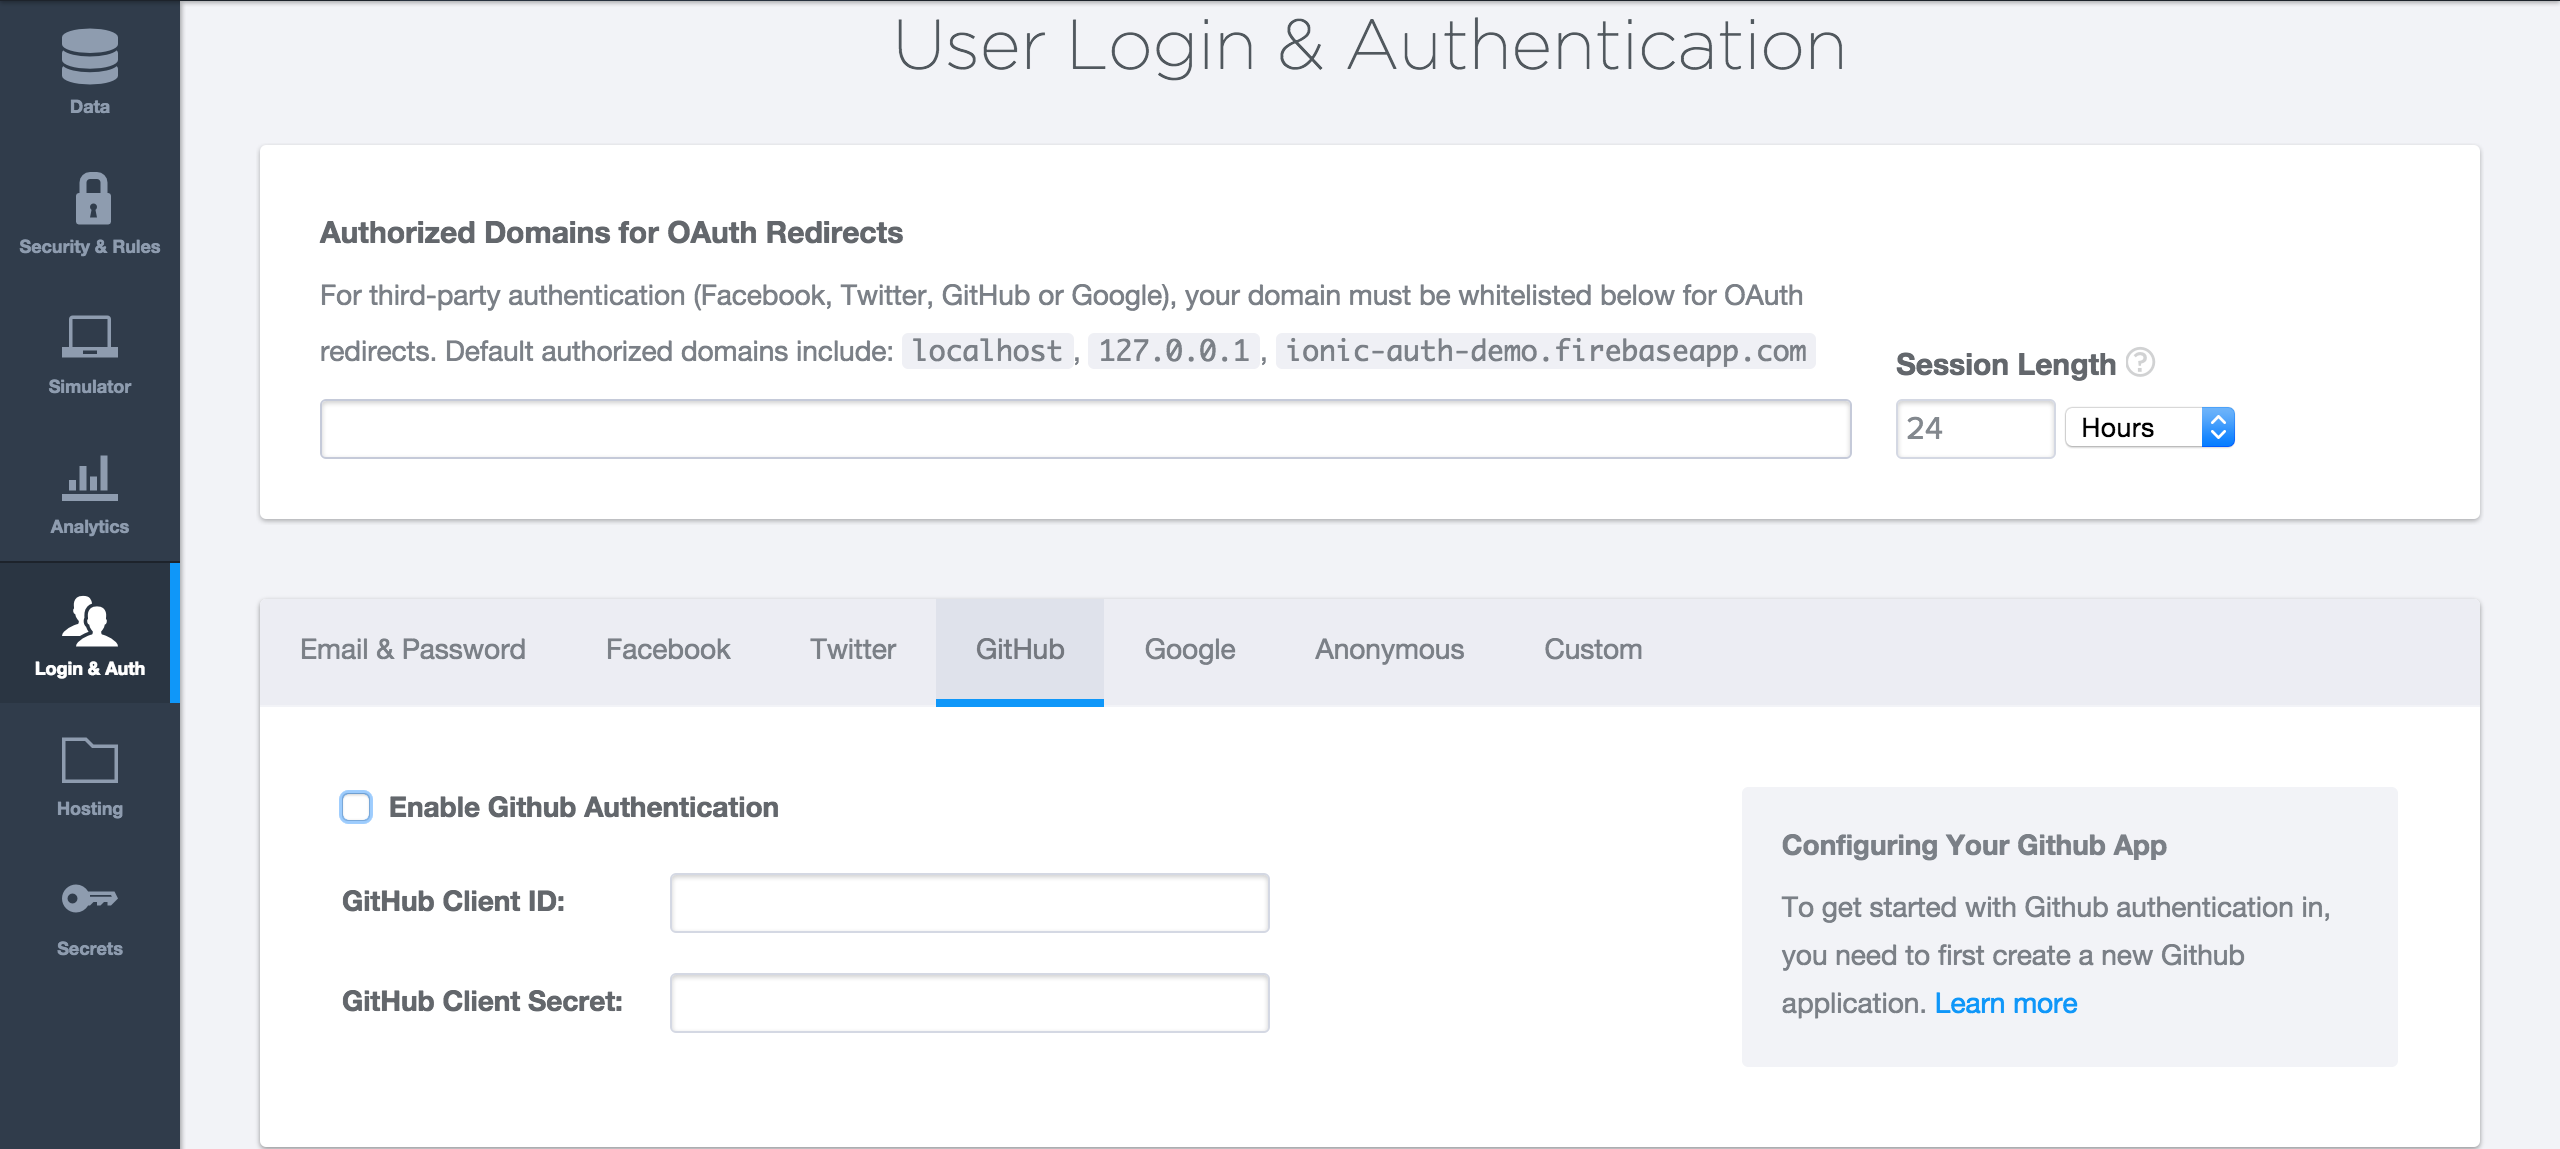
With a Firebase app already created, let’s navigate to the Login & Auth section of our Firebase app dashboard and enable GitHub authentication. Now we need keys from Github, so let’s create our app there and get our keys.
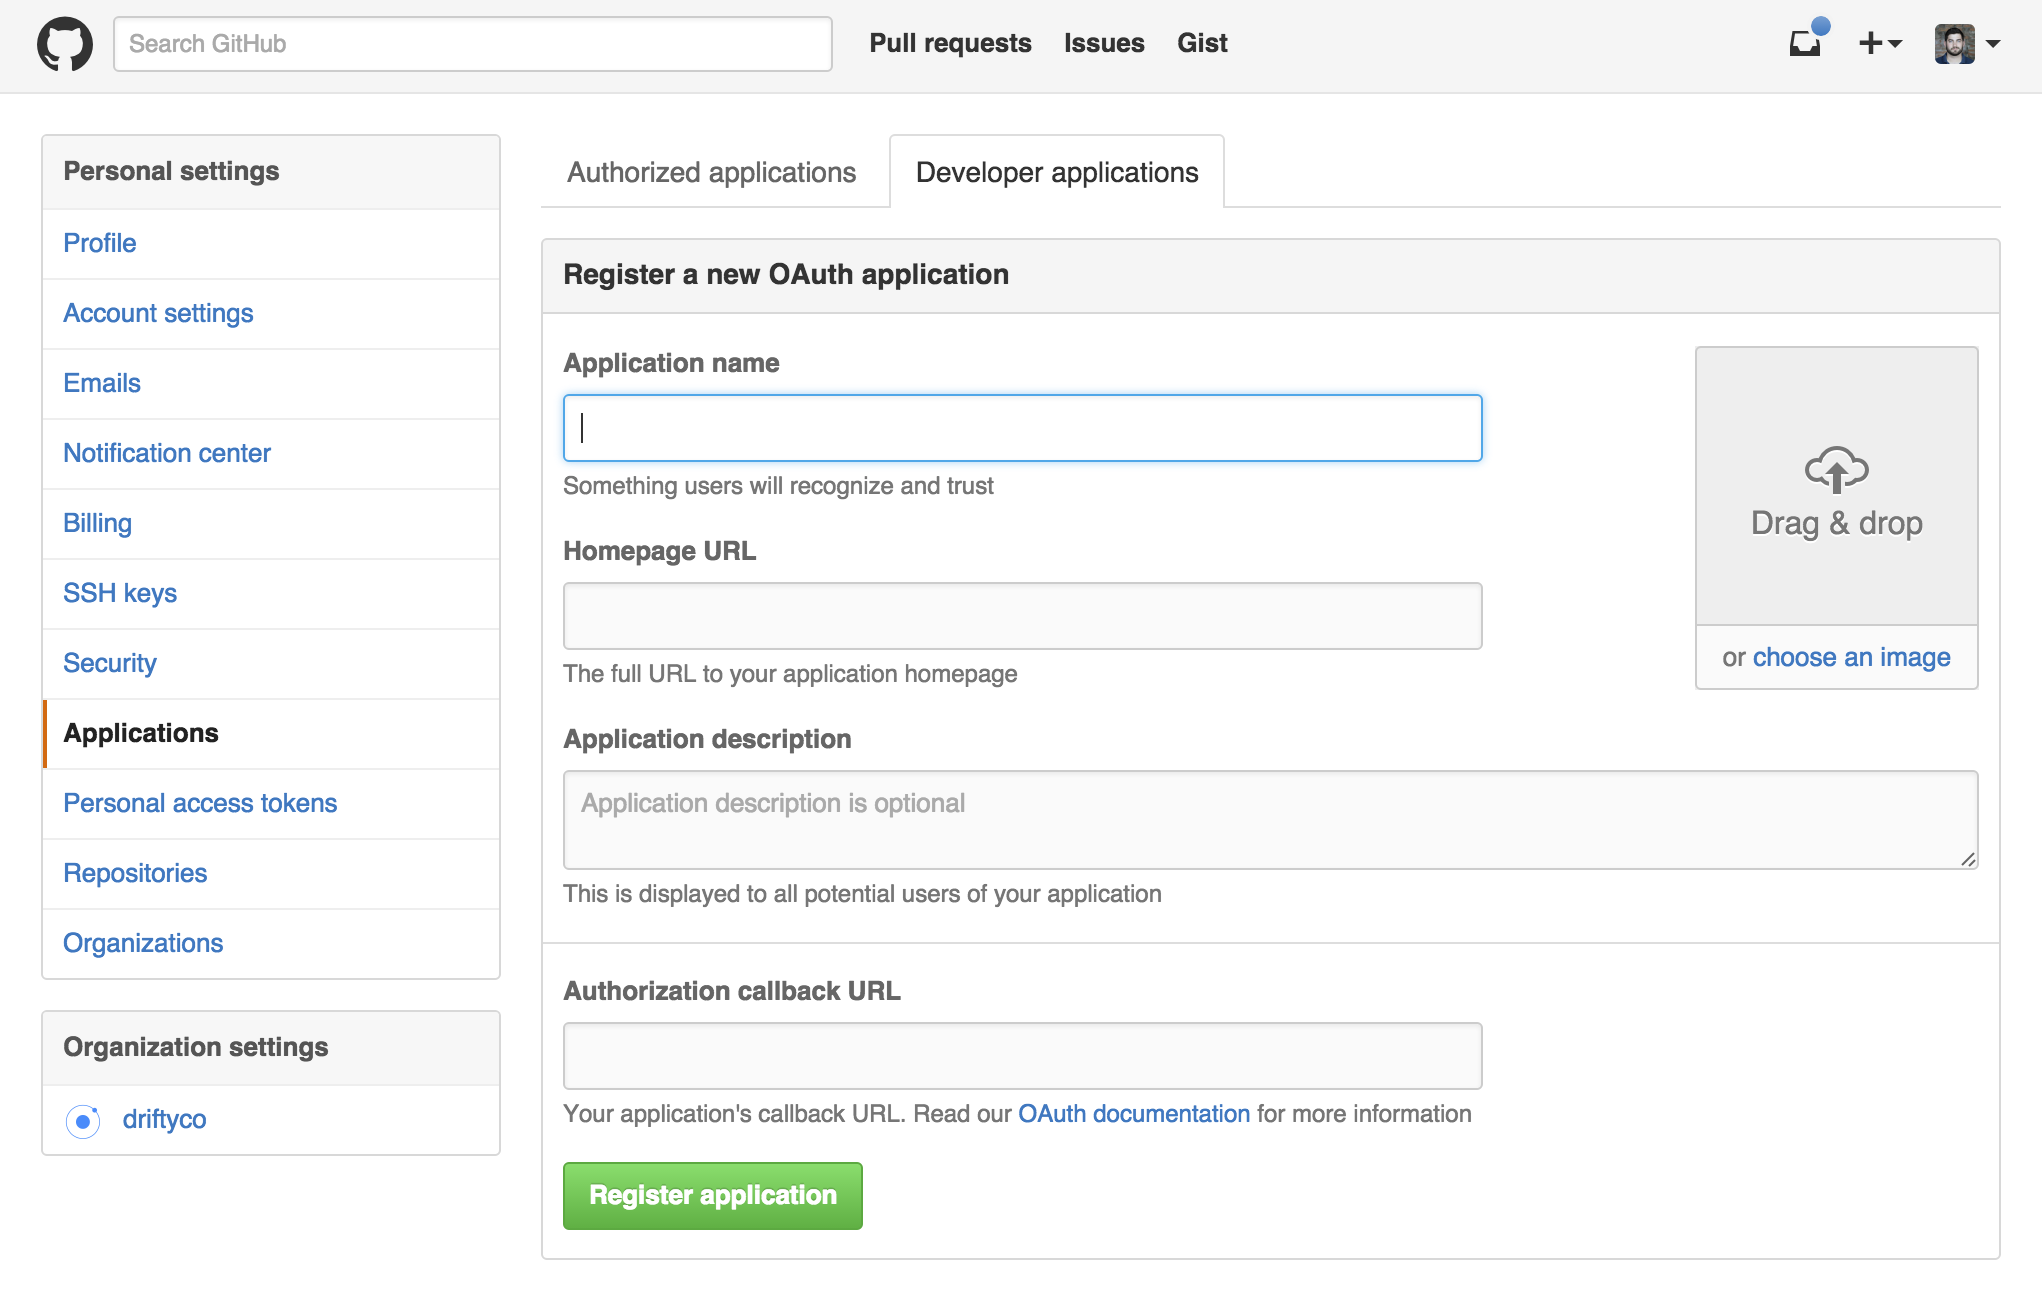
From here, we can create a new GitHub application. We’ll need to provide a unique application name, as well as a homepage URL (which can be your app’s landing page, support page, etc.). We also need to enter an Authorization callback URL, which will allow GitHub to properly communicate with Firebase. We’ll set this to https://auth.firebase.com/v2/<YOUR-FIREBASE-APP>/auth/github/callback. Be sure to change <YOUR-FIREBASE-APP> to your app’s name.
Once the GitHub app is created, we’ll take a client ID and a client secret and paste them into the GitHub authentication section in our Firebase app dashboard. From there, all the backend work is done, and we can start building our Ionic app.
Building out the app
Let’s create a blank Ionic app. Then we’ll add AngularFire/Firebase from bower and Cordova’s InAppBrowser plugin.
$ ionic start myApp blank && cd myApp
$ ionic plugin add cordova-plugin-inappbrowser
$ ionic add angularfire
We’ll add Firebase and AngularFire to the index.html.
<script src="lib/firebase/firebase.js"></script>
<script src="lib/angularfire/dist/angularfire.min.js"></script>
Then, we’ll inject Firebase as a dependency of our app.
angular.module('starter', ['ionic', 'firebase'])
First, let’s create a factory to handle authentication.
  .factory('Auth', function($firebaseAuth) {
    var endPoint = <YOUR_FIREBASE_URL> ;
    var usersRef = new Firebase(endPoint);
    return $firebaseAuth(usersRef);
  })
Again, replace <YOUR_FIREBASE_URL> with the URL to your Firebase. From here, we can create our controller and log our users in.
.controller('AppCtrl', function($scope, Auth) {
  $scope.login = function(authMethod) {
    Auth.$authWithOAuthRedirect(authMethod).then(function(authData) {
    }).catch(function(error) {
      if (error.code === 'TRANSPORT_UNAVAILABLE') {
        Auth.$authWithOAuthPopup(authMethod).then(function(authData) {
        });
      } else {
        console.log(error);
      }
    });
  };
})
Auth.$authWithOAuthRedirect will attempt to authenticate using redirects. This is the normal and expected way to handle authentication, but on emulators, this method may fail because it might not support redirects. We’ll handle this by calling Auth.$authWithOAuthPopup if there is an error. Since we installed the InAppBrowser plugin, AngularFire will use the plugin to handle login. Now, let’s create the UI.
We’ll create a simple button that logs the user in:
<ion-pane ng-controller="AppCtrl">
  <ion-content>
    <button class="button button-royal icon ion-social-github" ng-click="login('github')"></button>
  </ion-content>
</ion-pane>
Now, our button will call the login function and pass in the string of ‘github’ to be used in our authentication. We’ll add some more code to our controller, to see the data of the user once they are logged in:
  Auth.$onAuth(function(authData) {
    if (authData === null) {
      console.log('Not logged in yet');
    } else {
      console.log('Logged in as', authData.uid);
    }
    // This will display the user's name in our view
    $scope.authData = authData;
  });
This uses AngularFire’s $onAuth method to set some scope data once we’re successfully authenticated. We can display this data by displaying a few extra lines of markup to our view:
    <div ng-if="authData.github" class="list card">
      <div class="item item-avatar">
        <img ng-src="{{authData.github.cachedUserProfile.avatar_url}}" alt="">
        <h2>{{authData.github.displayName}}</h2>
        <p>{{authData.github.username}}</p>
        <p>Github</p>
      </div>
    </div>
Now we can see the user’s profile picture, username, and displayed name. We’ve now added user authentication to our app in just a few lines of code!
Parting words
This method of handling authentication can be used for more than just GitHub. Firebase can also handle user authentication with Facebook, Twitter, Google, and even anonymous users. A sample project can be found here.
For more information, make sure to check out these resources: